How to Set Up Stripe API Keys and Webhook Secret for Tipster Script: A Step-by-Step Guide

If you’re running a subscription-based platform like Tipster Script, integrating Stripe for seamless payment processing is essential. In this tutorial, I’ll walk you through how to set up Stripe API keys (both publishable and secret) and how to configure your webhook secret to handle real-time payment notifications.
Whether you’re in test mode or ready for live transactions, follow these steps carefully to ensure smooth integration with your Tipster Script.
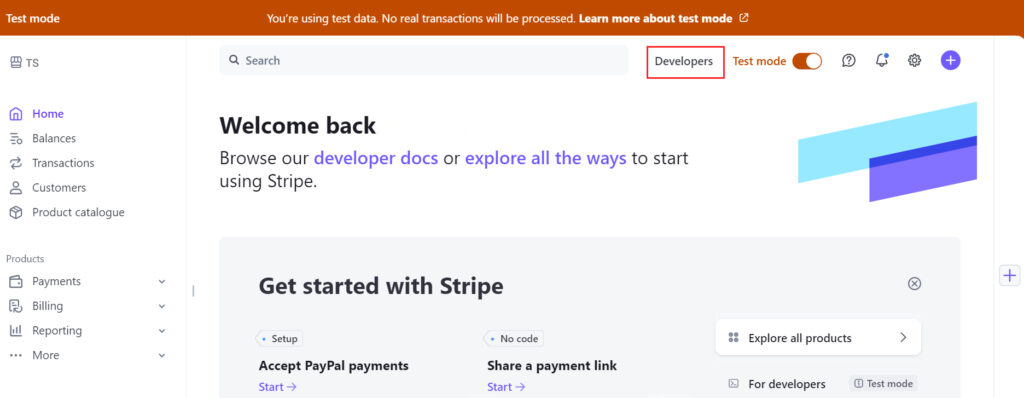
Step 1: Activate Test Mode on Stripe
Before diving into API keys and webhooks, it’s important to set up your environment in Test Mode on Stripe. This allows you to test payment processes without real transactions.
- Log in to your Stripe dashboard.
- Ensure you toggle Test Mode at the top right of your Stripe dashboard (this will appear in orange). You’ll see a notice confirming that no real transactions will be processed.
- Once you’re in Test Mode, navigate to the Developers tab at the top right.
Step 2: Retrieve or Create API Keys
Now, it’s time to grab your API keys, which will connect Stripe to your Tipster Script.
- Under Developers, click API keys from the sub-menu.
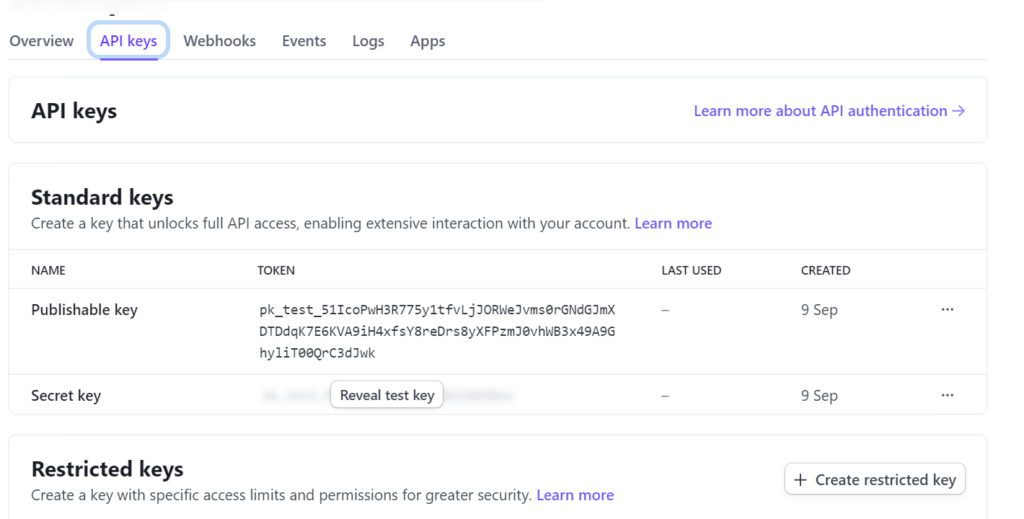
- If you don’t see keys already generated, click Create new key. If the keys are present, simply copy both the Publishable key and the Secret key.
Why These Keys Matter:
- The Publishable Key is used on the front-end of your application to create charges.
- The Secret Key is used to authenticate requests from your server and perform secure transactions.
Step 3: Configure API Keys in Tipster Script
Once you have your API keys, the next step is to integrate them with your Tipster Script via your WordPress admin panel.
- Log in to your WordPress dashboard (wp-admin).
- Navigate to Tipster Script -> Subscription Config -> Stripe.
- Paste both the Publishable key and Secret key into their respective fields.
- Click the “Save” button to ensure the keys are securely stored.
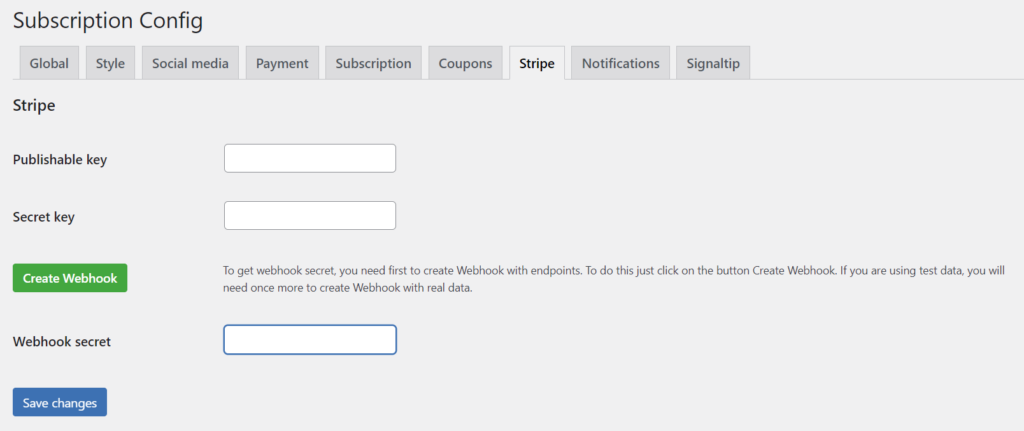
Note: It’s critical to click “Save” before proceeding. Without saving, the webhook won’t be configured correctly.
Step 4: Create a Webhook in Stripe
Webhooks allow Stripe to notify your Tipster Script about events (like successful payments) in real-time. Here’s how to create a webhook:
- After saving the API keys, click Create Webhook from the Tipster Script interface. This will automatically generate a webhook in Stripe with all the necessary endpoints pre-configured.
- Head back to your Stripe Dashboard.
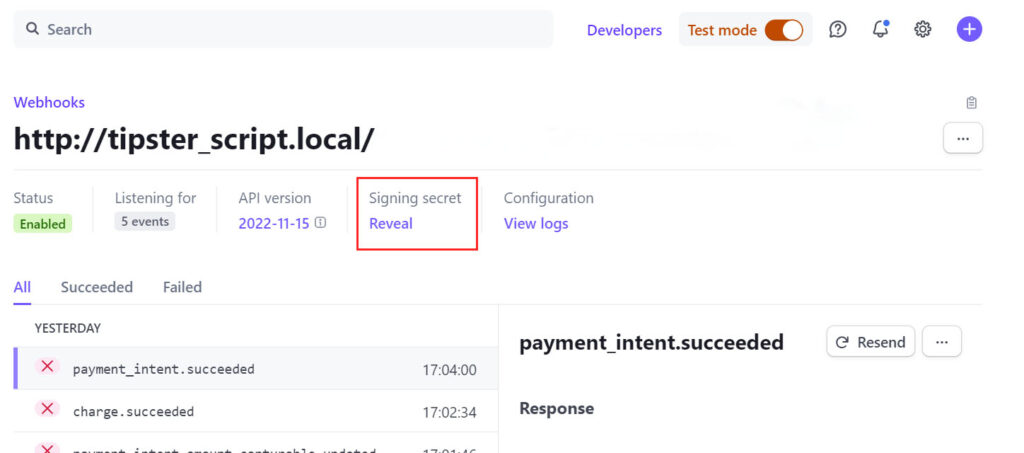
Step 5: Retrieve the Webhook Secret from Stripe
Now that you’ve created the webhook, you need to fetch the Webhook Secret to complete the integration with Tipster Script.
- In Stripe, navigate to Developers -> Webhooks.
- Find the webhook you just created for your Tipster Script and click on its URL.
- Look for the Signing Secret section and click Reveal to display the Webhook Secret.
- Copy the Webhook Secret and head back to the Subscription Config page in your Tipster Script admin area.
- Paste the Webhook Secret into the designated field and click Save.
Step 6: Test the Integration
With everything set up, it’s time to test the integration. Stripe makes this easy with Test Mode:
- Use the Stripe Dashboard to simulate test payments.
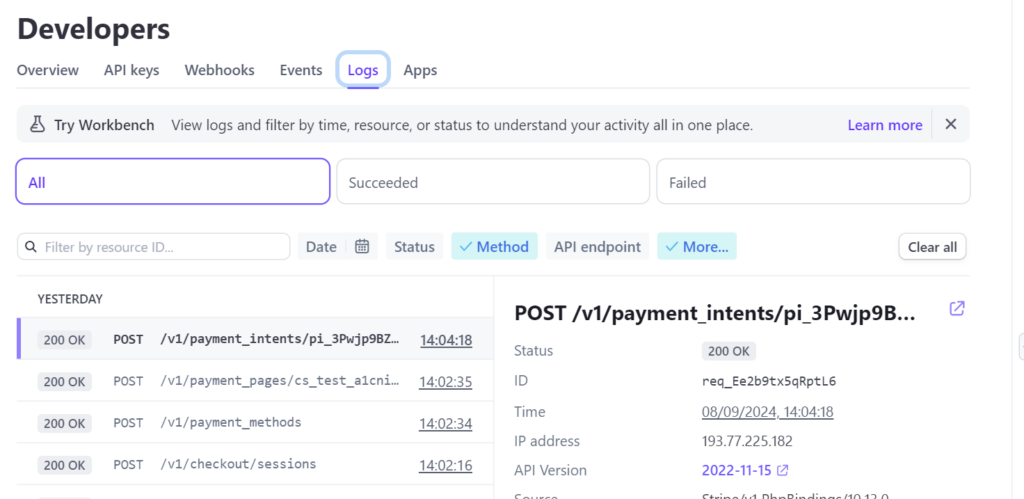
- Track transactions and responses by navigating to Developers -> Logs in your Stripe dashboard.
- Confirm that each transaction is captured and processed correctly in Tipster Script.
Step 7: Move to the Live Environment
Once you’ve fully tested the integration and ensured everything is functioning as expected, you can switch to Live Mode.
- Switch your Stripe account from Test Mode to Live Mode.
- Repeat the process of retrieving your Live Publishable key and Secret key.
- Create a new webhook in Live Mode and retrieve its Webhook Secret.
- Update the Tipster Script with these live details.
Step 8: Using Stripe Test Cards
To properly test your Stripe integration with Tipster Script, you’ll need to simulate transactions. Stripe Test Cards allow you to perform test payments without using real card details. These cards can be used in Test Mode only and simulate various scenarios, such as successful payments, card declines, and more.
How to Use Test Cards:
- When making a payment through Tipster Script, enter one of the Stripe test card numbers.
- You can use the card number 4242 4242 4242 4242 with any valid expiration date and CVC code for a successful test transaction.
- To simulate different scenarios (like a failed transaction or a charge dispute), Stripe offers a variety of test cards.
You can find a full list of test card numbers and scenarios on Stripe’s documentation page. Visit the following URL to access the complete list: Stripe Test Cards
These test cards allow you to test various outcomes in your Tipster Script without processing real payments.
Final Thoughts
By following these steps, you will have fully integrated Stripe with your Tipster Script, ensuring smooth payment processing and real-time notifications. Whether you’re in Test Mode or Live Mode, this process will allow you to manage transactions securely and efficiently.